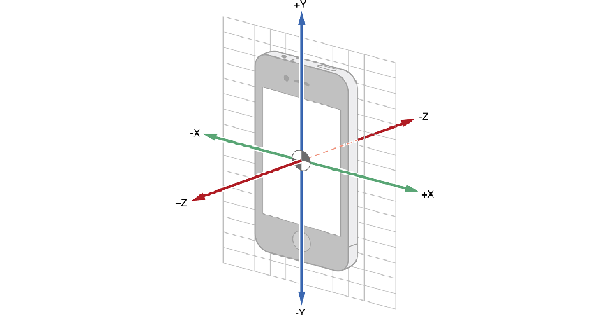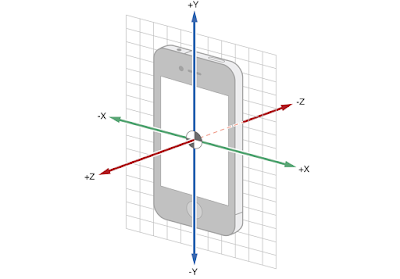

Welcome to my new tutorial in iOS - Objective-C. Today I'm going to share to you how to detect a device's rotation even when the device's Portrait Orientation Lock is ON. I have been spending many hours how to do this. I used to use the UIInterfaceOrientation before for my project. This is okay, I think, when you are developing applications especially in iPad, because people usually rotates their iPads.
One more thing, this tutorial will be so essential if you are developing an application with a camera function. Think about your camera application in iOS. The native iOS Camera App. Even though your portrait orientation lock is ON, or in iPad, the slide switch for orientation/rotation lock is ON, the camera would still give you a correct orientation of the photos and videos you take. The UIInterfaceOrientation would really work, however, it won't work if the rotation lock is on. What is the solution for that? The answer is: CORE MOTION.
I'm going to show you a step-by-step tutorial in making a project that uses this core motion. If you are too lazy or already knowledgeable to follow this tutorial, you may just download the finished project by clicking here: CoreMotionSampleG Project Download Link. I am tagging this post as an open source project post.
First of all, we make a new project. A single view project.
Next, we will be needing two frameworks for the core motion to work in our project. The CoreMotion.framework and the ImageIO.framework. So we will import these two frameworks in our project. I assume you do know how to import, since you are here for this quite advanced tutorial.
Third, in your ViewController.m (we can import the frameworks in our ViewController.h too), import your frameworks. If you imported the frameworks in your project settings, you can do this:
#import <CoreMotion/CoreMotion.h>
#import <ImageIO/ImageIO.h>
If this doesn't work, in my case it didn't, then do this:
@import CoreMotion;

@import ImageIO;
The code above doesn't need you to manually import the libraries or frameworks in your project settings. Pretty cool, right?
Declare the following inside your interface in your ViewController.m
UIInterfaceOrientation orientationLast, orientationAfterProcess;
CMMotionManager *motionManager;
Next, we will put our CMMotionManager in a method, to make our code somewhat cleaner.
- (void)initializeMotionManager{
    motionManager = [[CMMotionManager alloc] init];
    motionManager.accelerometerUpdateInterval = .2;
    motionManager.gyroUpdateInterval = .2;

    [motionManager startAccelerometerUpdatesToQueue:[NSOperationQueue currentQueue]
                                        withHandler:^(CMAccelerometerData  *accelerometerData, NSError *error) {
                                            if (!error) {
                                                [self outputAccelerationData:accelerometerData.acceleration];
                                            }
                                            else{
                                                NSLog(@"%@", error);
                                            }
                                        }];
}
Few steps to go. Okay, we will need to put a method called outputAccelerationData, this was called in our previous code. This is where you will put your codes, what will you do if a certain orientation is achieved.
- (void)outputAccelerationData:(CMAcceleration)acceleration{
    UIInterfaceOrientation orientationNew;

    if (acceleration.x >= 0.75) {
        orientationNew = UIInterfaceOrientationLandscapeLeft;
        NSLog(@"Landscape Left");
    }
    else if (acceleration.x <= -0.75) {
        orientationNew = UIInterfaceOrientationLandscapeRight;
        NSLog(@"Landscape Right");
    }
    else if (acceleration.y <= -0.75) {
        orientationNew = UIInterfaceOrientationPortrait;
        NSLog(@"Portrait");
    }
    else if (acceleration.y >= 0.75) {
        orientationNew = UIInterfaceOrientationPortraitUpsideDown;
    }
    else {
        // Consider same as last time
        return;
    }

    if (orientationNew == orientationLast)
        return;

    orientationLast = orientationNew;
}
Lastly, we will call the method in our viewDidLoad, or wherever you want if you are integrating CoreMotion in your project.
- (void)viewDidLoad {
    [super viewDidLoad];
    // Do any additional setup after loading the view, typically from a nib.

    NSLog(@"viewDidLoad");
    self.view.backgroundColor = [UIColor blueColor];

    [self initializeMotionManager];
}
Please do take note that we need to stop the motionManager if we are not using this. So in the sample project, I just put the stop function inside my dealloc.
- (void)dealloc
{
    [motionManager stopAccelerometerUpdates];
}
So we are now done. If you find this tutorial helpful, please share and subscribe! :)


Post a Comment